On Nate’s 3rd Birthday, we celebrated with a Sesame Street themed party. This was the second year for our Sesame friends, so I had some ideas of things to do, though almost all were different from those of the year prior.
I like to save money and do most everything myself. It is much more time consuming, but very inexpensive.
Homemade Sesame Street Invitations
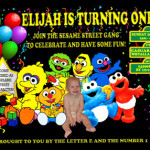
About a month before the party, I took a picture of Nate with some of his stuffed Sesame friends and had some prints made. I always like to incorporate a picture of the birthday child in the invitation. It personalizes it and also makes for a great collection for us to keep.
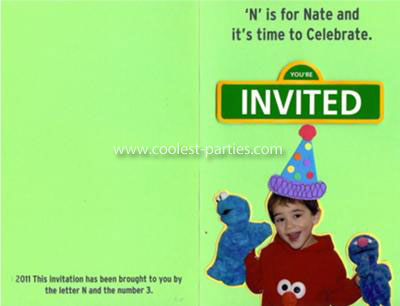
I found a nice, clear image of the classic Sesame Street sign and altered it to read “you’re invited”. I also had those printed. I arranged my text on the card and printed them out. On the front it said, “N” is for Nate and it’s time to Celebrate.”
Inside, was a cut out of Elmo holding balloons, and another picture that I edited from an image online, to include Nate’s head. The back read, “2011 This invitation brought to you by the letter N and the number 3.”
On the front, I cut out the image of the sign, applied sticky foam for dimension and stuck it on. I added a paper backing and party hat to the image of Nate and applied it to the front. With all details completed, we delivered within 3 weeks of the party date. When I plan parties, I want to make sure that the most amount of guests can attend.
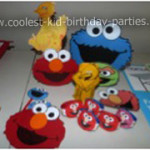
For the decorations: Lucky for us, we have a plethora of Sesame Street stuffed animals and toys and books, which we used to decorate the upstairs of our house. I strung small plastic figures and hung them from places. I used punching balloons from a dollar store, in groups, hanging from the ceiling to add some color. We also had a dozen latex, helium balloons in Sesame colors. I picked up a bunch of Sesame Bulletin Board (like for teachers) borders at the dollar store. Finally, we had three large pop-up Playhut houses that I found for a great deal, before his birthday last year, which were not only decorations but activities as well. After the party last year, we put them away, so this year, they were even “new” to him.
My daughter and her friends made birthday signs which we also hung. We used store bought plates and hats with Sesame characters.
For the food: It was a morning party, so we had snacks and cake, instead of a full buffet. I purchased a number of items from the Earth’s Best line, which included crackers in the shapes of characters, as well as cookies resembling toy blocks. We included finger fruits, vegetables and cheese to round it out.
For the cake: The cake was by FAR the most amount of work, as usual. I am a hobbyist in the cake departing, completing usually two a year, one for each child.
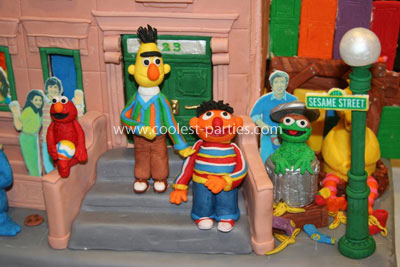
In preparing a design for the cake, I asked Nate what he would like on it. I was expecting, “Cookie Monster or Ernie”. Ummm, no. Instead, I got the answer, “Maria, Luis, Gaby, Susan, Gordon, Miles.” Yeah, suuuuure, let me just whip up those people. I was stumped. Then, I had an idea. I built Sesame Street from gumpaste and when it was assembled, I added those human characters in the windows.
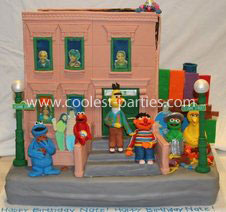
I found images online and in books and sent them to a friend to be printed on edible sugar sheets. It was as easy as attaching a sticker, when I “glued” them to the gumpaste.
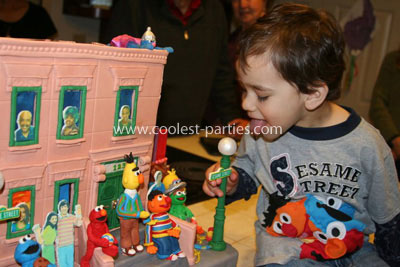
The rest of the characters and lamp posts were made using a combination of gumpaste and fondant and a whole lot of patience. I really like doing it, otherwise, adding toys to a square cake, decorated like a building would work just as well.
For the activities: Because the kids were just 3, we decided not to do specific games. Rather, we had a table set up with crayons and coloring pages. There are loads of printables available online. I made sure to print out some alphabet ones, with the first letter of the names of each child. We also had colored popsicle sticks which we used as handles, to make Sesame puppets. The kids colored the faces from printable sheets, cut and taped them to the stick.
The three Sesame pop-up tents also served as entertainment for this group.
Homemade Sesame Street Favors
The favors were displayed on the table in the foyer, so they were a perfect decoration in and of themselves.
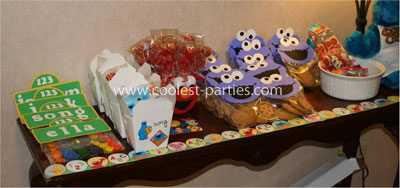
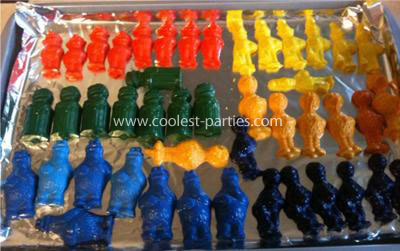
For the favors: “Recycle*Reuse*Renew” That’s one of our mottos. For the favors, we did just that. My daughter and I took a big bucket of broken crayons (who doesn’t have broken crayons?!) and peeled them, sorting by color into empty aluminum cans. I melted the wax and poured it into a candy mold (make any candy FIRST, before using for wax). Each character, popped right out after cooling. I only bought one mold, that had 6 different characters, so this took quite some time. Having the cans, simmer in a pot of boiling water, kept them warm, so that we could go from one batch to the next, without having to re-melt each time. You can find all kinds of character molds. I actually bought a lollipop mold because it had one of each character, thus less molds to buy.
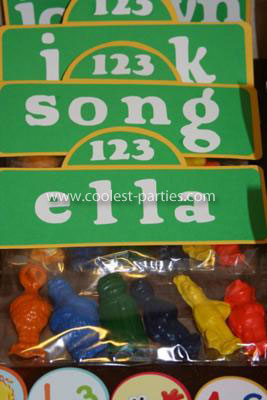
While I was waiting for the crayons to cool and harden, I made personalized signs for each of the kids attending the party. I just figured out how big they needed to be and made rectangles from yellow and green, then cut out letters and numbers. I, then, filled each cellophane bag with one of each crayon, and added the sign to the top.
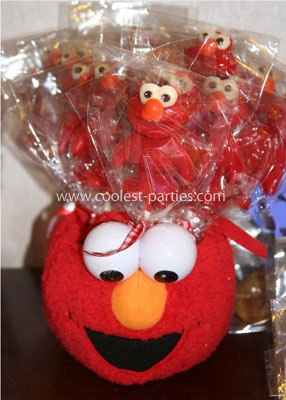
Nate wanted to invite his daycare teachers as well, so I knew there would be adults and a few older kids, who probably wouldn’t need Sesame crayons. I had two edible favors as well. I made Elmo lollipops, using a very similar mold. I used easy candy melts to make the lollipops, which were wrapped in cellophane bags and tied with a ribbon. I used an old Elmo bucket, and inserted a piece of floral foam into the bottom, into which I inserted each of the lollipops and put on the table for display.
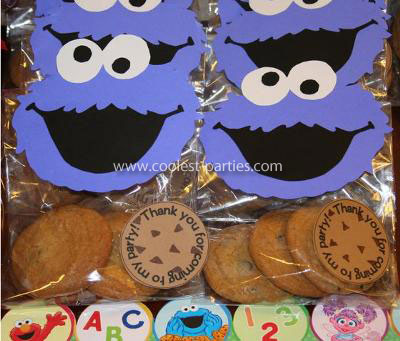
The final edible favor was chocolate chip cookies (who doesn’t love those?!). I filled each bag with a few cookies, added a cut-out Cookie Monster tag and a small cookie tag, thanking the guests for coming to the party. You don’t have to have a Cricut or other machine to make these. I just found a coloring image, cut and traced onto blue paper.
To round out the favors for the little kids attending, I purchased a few stamps and note pads in the Sesame theme from Target’s dollar spot. We put all of the items into a plain Chinese food take-out box, which my daughter decorated for each child.
Wow what a great party you must of had 8).
I really love the crayon idea.
H x
I just wanted to tell you that I think you did a wonderful job on your son’s birthday party! My kids love sesame street and your ideas were great! I have six cakes on here and I look at the site all the time and I had to tell you how much I loved your pictures! Great job!
Great job! Love the crayon idea as well and your cake is beautiful!
I’ll be 50…in three years..I would love someone to give ME a sesame street party!! Wonderful job!
Hi, Can you tell me how you edited the sesame street sign? I love that idea. We are planning our son’s first birthday and i would love to use that You’re Invited sign as part of the invitations.
Thank you
I loved this party! I have seem many elmo and sesame street party themes but this is very original
How did you get the molding on the sides of the cake?? That’s a great cake!
I’m blown away that you did it all yourself, that’s awesome!! What great ideas and execution! Many kudos to you!!!