Winnie the Pooh party ideas and photos by: Margaret from Farmington Hills, MI
My son Michael’s birthday was coming up March 29, the year was 2004, and he wanted to have a Pooh Party for his 2nd birthday. So right away, I thought about the big blank wall with the slanted ceiling we have in our living room and what I was going to decorate it with!! My family is always really eager to see what we will do to “the wall” next.
I then got out a brand new notebook to use to plan my party in. I only write in pencil, so I can make plenty of changes, and it never looks too bad. Each “subject” had a few blank pages that followed. Subjects were: Winnie theme, guests – adults and children, food, Pooh mural ideas, other Winnie the Pooh decoration ideas, Winnie the Pooh games, Winnie the Pooh gift list for kids and adults, and Winnie the Pooh party agenda. Sounds like a lot of extra work, but it really helps to have it all written down in front of you.
Invitations: We had twenty adults, three teens and twelve children under the age of 10 attend this party. On the Winnie the Pooh invitations, I asked everyone to wear something Winnie the Pooh related. One pregnant guest came dressed in a short red T-shirt showing her tummy and tan pants. My husband, kids and I all wore clothes that had at least one of the Winnie the Pooh characters on it- real easy for children!
Decorations: I find that homemade decorations tend to look a lot nicer than the store bought items, and if you can draw, you have an advantage! The first thing I did was find Winnie the Pooh pictures online I thought would look great on our living room wall as our mural (“muro”, as we call it).
I then searched the dollar stores looking for Winnie the Pooh themed items I might use for decorations. I purchased: A birds nest, small round vase and paints (brown, yellow and white), poster boards, streamers, balloons, plates, utensils and napkins. I took my notebook with me shopping, so I had the guest list in front of me and bought a gift for each child (I wrote next to their name what their gift was).
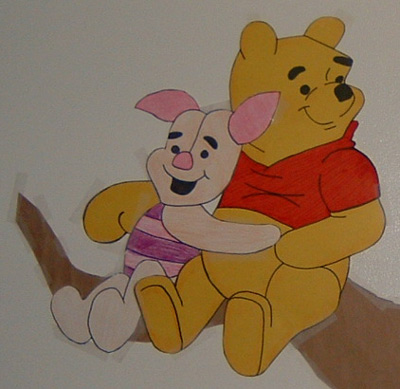
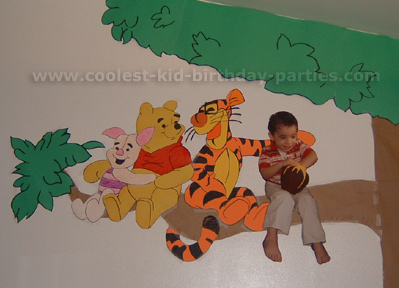
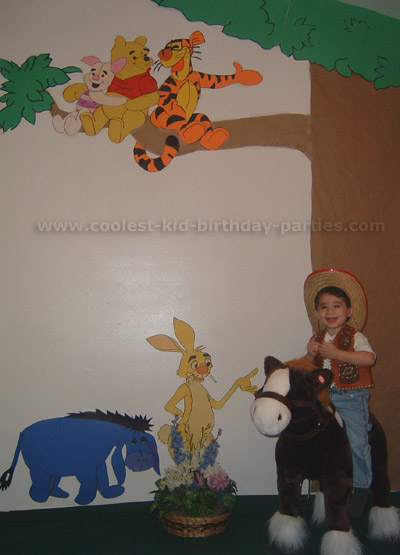
Muro-pictured: The picture I found for my “muro” was a tall tree with Piglet, Winnie the Pooh and Tigger sitting on a branch in the treetop (in that order from left to right). Piglet and Winnie the Pooh are hugging, and Tigger has his left arm extended as if presenting something. There is an empty spot next to Tigger.
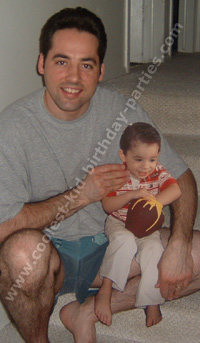
What I did was I took a picture of Michael sitting on the arm of our couch (so his legs would be naturally bent). We had the picture printed almost life-size like a 2 yr old, and it looked as if he was sitting, once I cut his image out.
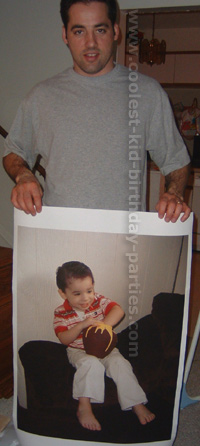
I then made the tree trunk and branch out of the brown paper wrapping that you mail packages in and taped it to the wall with the help of my husband! I then drew out the other characters to be the size of Michael’s image.
I drew Piglet on white poster board and colored him in crayons, Winnie the Pooh I did on yellow poster board and did his shirt in red marker, Tigger I did on orange poster board and used yellow craft paint for the yellow parts. I then taped them on the wall as they were done.

I continued on green poster board and drew the green leaves you see on the treetops and at the end of the branch they sat on and taped them on the wall.
Finally, we added Michael who sat next to Tigger! It actually looked as if Tigger had his arm around Michael!
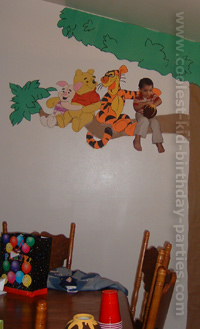
Using the blue painters tape on the back of the Pooh pictures helped, because if you’re trying to save the decorations, as I did, the blue tape didn’t rip the poster board-like other tapes would have – and it still did the job. I did use clear Scotch-tape everywhere else.
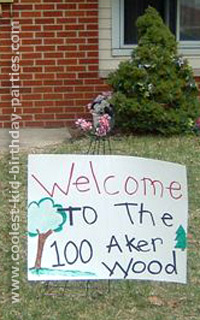
Pooh sign for front lawn – pictured: Used white poster board and wrote, “Welcome to the 100 Aker wood”. I sewed it to one of those metal things that you use to help a rose bush stand upright (the kind that starts out narrow at the bottom and the bars spread out wide at the end – like an open hand). I used that because it was breezy and the other signs I made were being blown over – so by cross stitching (with needle and thread) around the back of the metal wires like an X, it kept the sign in perfect place. I did a couple cross-stitches where needed (worked like a charm!). I put it on our front lawn.
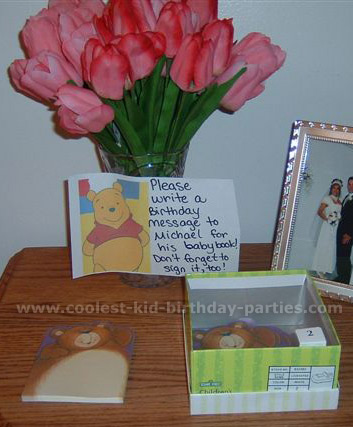
Message for the Birthday Boy: on a small table, I had a piece of paper with Winnie the Pooh on it that said “Please write a birthday message to Michael for his baby book. Don’t forget to sign it!” I put a small shoebox for them to leave it in, along with a pen to use! I do this for all their birthdays and keep the messages in a big envelope along with any letters or cards they receive for that year. It makes for a nice keepsake.
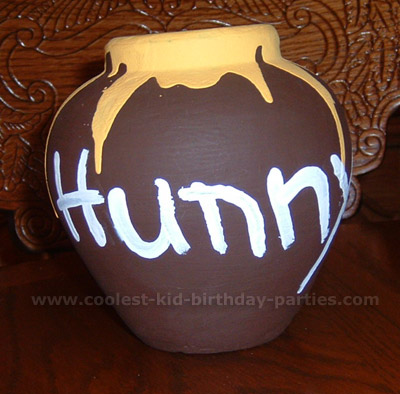
Pooh Hunny Jar: I bought a round vase and brown, white and yellow craft paints from the Dollar store. Painted the vase brown, let dry, poured yellow paint around the rim of vase and let it drizzle down like spilling honey.

Then I let it dry and painted the words “HUNNY” on it in white.
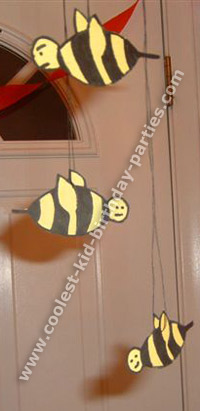
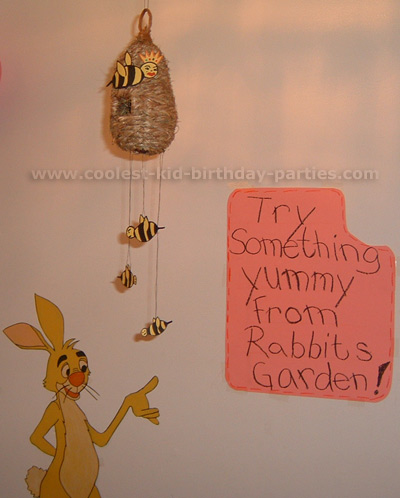
Pooh Bee Hive: At the dollar store I found what was called a bird’s nest – but looked to me like a beehive! I Drew a big bee on yellow construction paper with a jeweled crown and red lipstick (Queen bee, of course), stitched her to the hive with needle and thread, drew 3 more smaller “worker bees” on yellow construction paper and put black thread through them and let them dangle under the hive and hung the finished hive in the front entrance where we had the food table set up.

Picture of Rabbit and sign: I found a picture of Rabbit I liked – drew it on yellow poster board and made a sign to go along with it that said “Try something yummy from Rabbits garden”. I taped Rabbit and the sign above the food table to look as if Rabbit was standing behind the table (since I didn’t draw legs on him!)
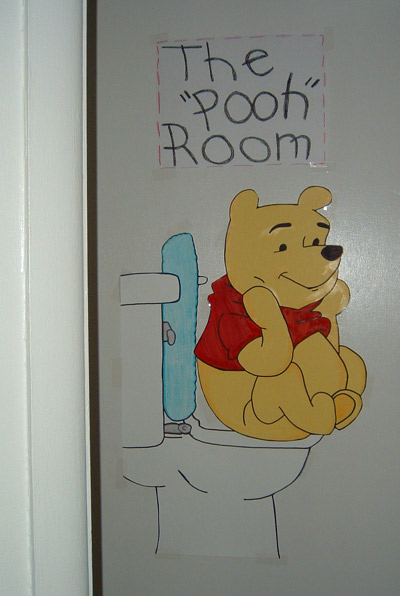
Pooh Room: I had a last minute idea for a decoration – I drew a picture of Winnie the Pooh sitting on the potty and put a sign above it calling it ‘The “Pooh” Room’ (for all the guest who didn’t know where our bathroom was located). I found one of my children’s potty training books that had a picture of baby Kermit sitting on the potty – so I “copied” that toilet onto white poster board, found a picture of Winnie the Pooh sitting on the ground online (perfect sitting position) and drew that onto yellow poster board and used red marker for his shirt.
Pooh Food: I Served pizza, had a Veggie tray with dressing, a dessert called “Dirt n’ Worms ” I found online. I used a 9×11 cake pan instead of an actual pot. Made a carrot garden (found little candies that looked like carrots) made fences with pretzel sticks, a “flower bed” from frosting. In a bowl, I had Honey Bear grams and other desserts.
Pooh games – Adult Name Tag “Lottery”: When an adult arrived to the party, I would give them a pre-written tag with their name on it and a number on the bottom. The same # was written on the back of the sticker, too. After they’d put their sticker on, they were told to fold and place the back part with their # on it into the Hunny pot. Right before the kids’ games started, I had Michael pull #’s out and let the winners pick a wrapped gift. Had about 10 Dollar store gifts (such as nice coffee mugs w/candy in them, garden decorations and stationary, so not every adult won a prize – but that’s why it’s called the Lottery – not everyone wins!)
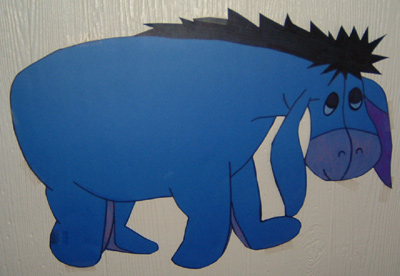
Pin the tail on Eeyore: I drew him on dark blue poster board and made about 20 tails, put a line of white-out on the tail and pre-wrote all the kids names who were attending and a few with no names-in case more kids show up, they’d be ready to write on. I used the 1st tail made as a template. Because the tails were drawn on poster board, they were sturdy enough to keep tracing!
Hot potato: I used a small stuffed Tigger
Popsicle Hunny Pot Drop: Every child had 10 attempts at dropping Popsicle sticks into the Hunny pot. The one who got the most in, won.
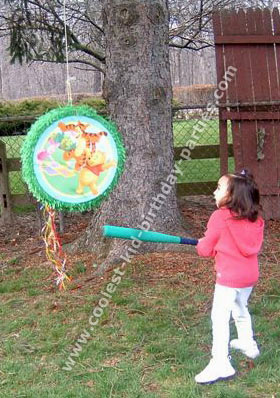
Pinata – Winnie the Pooh of course! I gave the children an empty Winnie the Pooh goodie bag to put all of their candy in.
How many are in the jar?: I put 52 Honey Bear Grams in a jar, the adult guests who came the closest, won the jar (which had a computer label saying ” Hunny Jar”, with little bees flying around).
Pooh Prizes: Every child received a goodie bag full of candy and toys. I bought an age appropriate “Winnie the Pooh related” gift for every child, wrapped it, and had their name on it so everyone got a prize. The first time a child wins a game, they get their gift, if they win again – they received miniature Hershey candy bars. I found a website that had free candy bar wrappers with pooh on them (there were about 6 different ones to choose from). I printed them, cut them and glued them over the original wrappers-they looked adorable!
Pooh Cake: After the games were all played, we sang happy birthday, and enjoyed our Winnie the Pooh decorated cake.
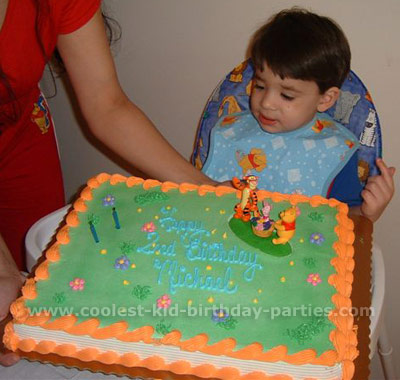
Opening Gifts: We let Michael open his gifts as all the guests watched and finished their cake. Guests started to leave about 45 minutes after the gifts were opened. Michael thanked all of his guests for coming and for all the nice gifts (as only a “new” 2 year old could!).
Thank-you notes: I used Winnie the Pooh stationary I printed for free from a website. I made on the computer personal thank-you notes to all who attended. I thought it’d be nice if we included a picture of our son in the thank-you cards. We posed him in front of the Winnie the Pooh Muro wearing a cowboy vest my maternal grandmother had made for my Uncle, who had just passed away 3 months prior to this party. (The vest was hand made in the early 1950’s by my grandma who passed away in the early 1960’s, my aunt thought we’d like to keep it in our family, so she passed it onto me). He also wore his cowboy hat and was on a horse he received from my younger brother. I put the flowers in front of Rabbit because he had no legs/feet. We also took Michael’s picture down from the tree, it looked kind of funny having “2” Michael’s in the picture.
The Pooh party lasted for about 4 hours. Everyone had a good time and Michael really enjoyed it. A majority of the Winnie the Pooh party took place in the house; fortunately, the weather let us have the Winnie the Pooh pinata in the yard. Keeping to an agenda really made things run smooth and more orderly – which is important when there are lots of people (especially children!).
