Twist the 3 Most Popular Shapes – Dog, Swan and Sword
You’re not an expert balloon twister (and you don’t strive to be one). All you want right now is to learn some basic balloon animal instructions so that you can twist a few shapes at your kids party. Or, even better, teach the kids to twist their own easy shapes. So, Let’s get the ball(oon) rolling!
REMEMBER: Balloons are fun toys, but can be dangerous like all toys… PLEASE make sure small children do not chew balloons or have access to broken bits. Adult supervision is recommended.
Just below, we’ve written for you balloon animal instructions for the three most popular balloon shapes: Dog, Swan and Sword
Twist a Dog
1. Inflate a 260 balloon and leave about 4 inches uninflated in the tail end.

2. Fold the balloon about six inches from the nozzle end. Now part of the balloon will be sitting along side itself.

3. Squeeze both parts of the folded balloon about 2 inches from the fold (where the arrows are in the diagram below).
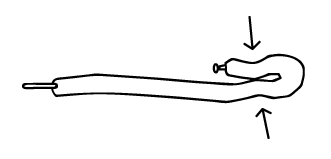
4. Now twist the balloon where you squeezed it. Twist it twice or three times until the twist holds in place. Notice that you’ve just made the ears of the dog (the short end with the knot and nozzle is the nose).

5. The front and back legs are made the same way as the ears. Fold the balloon an inch below the twist that formed the ears. Now twist the balloon to form the front legs.
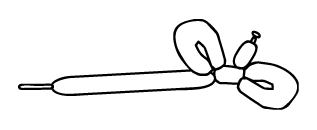
6. Finally, fold the balloon 2 inches away from the twist that formed the front legs and twist.
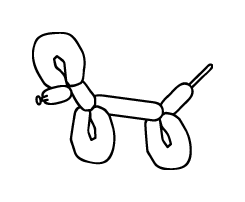
Voila! There’s your little balloon puppy.
Let’s try another one…
Balloon Animal Instructions for Making a Swan
1. Begin with a white 260, inflated leaving a 4″ tail. Bend the whole balloon into a large circle, bringing the knot to a point about 6-8 inches from the uninflated tail.
Flatten the circle by bringing the point opposite the knot across to the knot (see diagram below). Twist everything together at this point and make sure you hold on to the knot.
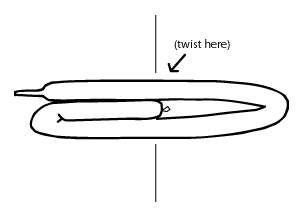
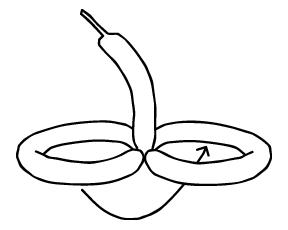
2. Your balloon should now look like the diagram below (two large loops with a long bubble sticking out from the joining point.) Squeeze one of the loops and tuck it through the center of the other loop. This is the swan’s body.
3. To make the head, fold the uninflated end of the balloon back along the balloon body. While holding the end in that position, squeeze the air from the main chamber around the bend in the balloon. This will make the balloon stay in a bent position creating a curve for the swan’s head.
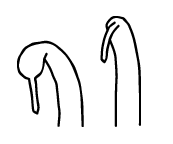
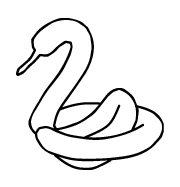
4. Pull the neck back so that the friction of the twisted ends of the body loop hold it in place. And there’s your swan!
Balloon Twisting Instructions for Making a Sword
1. Inflate a 260 balloon and leave about 4 inches uninflated in the tail end.

2. Fold the balloon about six inches from the nozzle end. Now part of the balloon will be sitting along side itself.

3. Squeeze both parts of the folded balloon about 2 inches from the fold (where the arrows are in the diagram below).
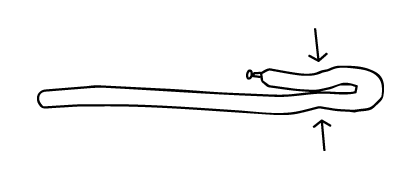
4. Now twist the balloon where you squeezed it. Twist it twice or three times until the twist holds in place. Notice that you’ve just made one side of the sword handle.

5. Fold the balloon again as shown in the diagram below and twist again (like you did last summer… ;-)
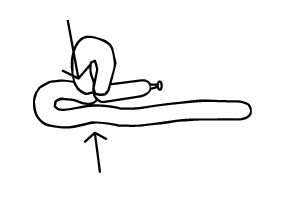
6. Lodge the long part of the balloon between both handles and… ENGUARDE!
Kid Birthday Parties › Kid Activities › Balloon Animal Instructions
